Quick Guide to using Salesforce Surveys

7 min
It is no secret that everyone expects first-class customer service when they choose to do business with a company. Strong client-centric organizations take this very seriously. Of course, we may think that we’re delivering on that mission, but we’ll never really know . . . unless we ask.
Surveys are the perfect tool to reach out to our customers after various types of interactions to see if they had the experience they were looking for. Feedback from surveys can be used to celebrate successes and identify areas of opportunity to improve.
Fortunately, Salesforce has a native solution that is easy to use, deploy and report on. This guide will give you an overview of surveys and provide tips for rolling this out in your org.
1. Choose a Survey License Type
There are three types of survey licenses in Salesforce: Survey Response Pack, Salesforce Feedback Manager – Starter and Salesforce Feedback Manager – Growth.
All three can perform basic capabilities such as creating surveys, applying branch logic, and embedding a question in the email (great way to get users to start the survey). Survey invitations can also be initiated by flow and can be supported in multiple languages.
- Types of Salesforce survey licenses
- Survey Response Pack
- Salesforce Feedback Manager – Starter
- Salesforce Feedback Manager – Growth
While edition impacts the number of responses, in general the Response Pack gets 1000 survey responses, while the Starter option comes with 100,000 per year, and the Growth option is unlimited.
The Feedback Manager licenses also have advanced capabilities such as attachments, merge fields, and updating fields based on responses. The two plans also get five licenses for Lifecycle Analytics, which gives access to the Customer Lifecycle Analytics Base App. The Growth plan also allows the survey to be embedded in a webpage and to track surveys across a customer’s lifecycle.
2. Enable and Permit
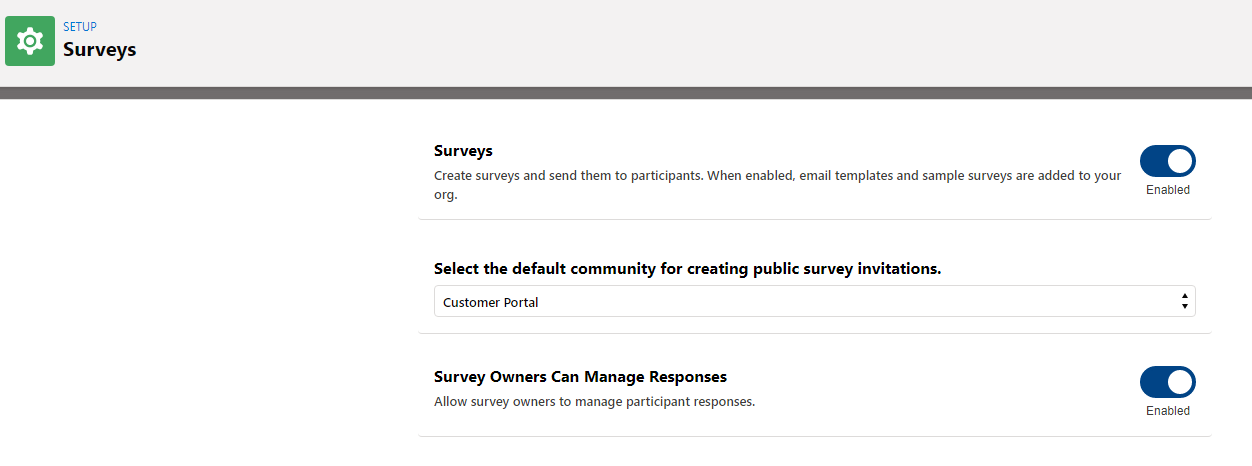
Like most features in Salesforce, the first step is flipping the switch on. This one is simple – just go to set up and search Survey Settings. From there, Enable Surveys. Since most surveys will be going outside the org to the public, select the default community for creating invitations to complete the survey. Lastly, choose whether or not survey owners can manage response.

After enabling it for the org, the next step is to ensure the right people can use this. Through a combination of Profiles and Permission sets, make sure that whoever needs to manage surveys will have access.
3. Build a Survey
Okay, enough about getting up and running. Time to build the first survey. Similar to Email Templates, surveys are actual records of the Survey object. After navigating to Surveys, select “new” to get started.

This will take you to the survey builder. Similar to Lightning Record Pages, Lightning Email Templates, and In-App Guidance, this page is easy to use with no code and similar drag and drop functionality.

The process starts on the welcome page. We can start with a message to greet the customer and explain what they are going to do. From there, click on “Add Page” on the left-side pane to start adding questions.
4. Add Questions
After adding a new page, you will be prompted to begin adding questions. There are twelve different types of questions. Each question starts with a simple text box for us to ask the customer the question. The question type refers to how they will answer it. When you add a question and select a type, you will start by typing into a text box the question you want to ask. You will see the response options below.
Date: Simple Calendar
Like or Dislike: Thumbs Up/Like or Thumbs Down/Dislike
Long Text: Large text box for the customer to speak their mind
Short Text: Shorter answer (up to 200 characters)
Single Selection: Add choices for the customer to choose from (single select)
Multiple Selection: Add choices for the customer to choose from (multi-select)
Net Promoter: Official NPS question (1-10) with scoring based on likelihood to refer
Ranking: Provide list of items for the customer to rank from top to bottom
Rating: Customer rates based on the number of stars. Default is 1-5 starts.
Score: Customer rates based on number scale. Default is 1-10.
Slider: Customer moves the slider along the number scale. Default is 0-10.

5. Other Page and Question Attributes
Display Logic – allows us to conditionally display different questions. For example, let’s say that you use a Rating question with a range of 1-5 stars. This might be followed up with two conditional questions, in this case Long Text. The first conditional text box might only display if the previous response was 5 Stars, and ask the customer “What did we do well?” The other conditional text box only displays if the previous response was 1 Star, and asks “What can we improve?” Neither question would display if 2, 3, or 4 Stars was the response.
Required – each question can be required for the customer to continue moving through the survey.
Add Questions to Page – each page can contain multiple questions. Think of the customer experience first when deciding how many pages and questions per page to display.
6. Branding
Companies take great pride in presenting a consistent look and feel for their customers across various different platforms. Fortunately surveys can be customized to provide the same branding. Use this section to display a background image. This image can be blurring or fully realized. The survey can sit on top with full, partial, or no transparency so that the background image shows by adjusting Opacity.

Furthermore, we can adjust the color schemes on the questions and answers, as well as the Start, Next, Previous, and Finish buttons.
7. Email Settings
Navigating to the Default Settings under the three dots in the upper right corner, we can customize email settings as well. Content can be delivered through a URL link to the survey, or we can choose a survey question to imbed in the survey invitation. This is a great option because the customer actually starts the survey right from their email. The answer they choose for the first question is registered and gets them going.
For the template, Salesforce utilizes Lightning Email Templates. It comes with a default template called “Embed_a_Survey_Question” that can be edited with other information that you may want (see more below).
Lastly, we can determine who the email comes from. To do this, set up an organization-wide email (under “Organization-Wide Addresses” in Setup). Once this email address has been created, activated, and confirmed, you can set this as the “from” email on survey invitations.
8. Email Templates
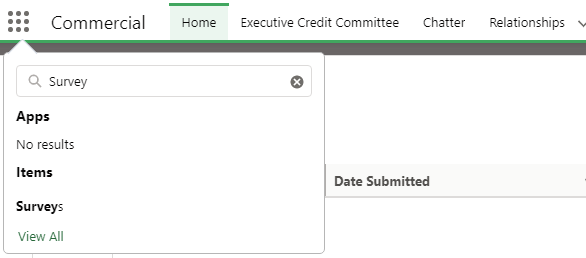
Lightning Email Templates are records. You can find the Lightning Email Template object through the App search. Unlike Classic Email Templates, which are found in Setup, these objects show up with records for each individual survey. The Lightning version of these templates are very easy to use, with drag and drop functionality to set up the page. Edit the subject, use a letterhead, and quickly insert pictures and text into the template.
If you would like to imbed the first question from the survey into the email, the default survey email template already has the merge fields set up. If for some reason you lose, it here it is again here:
{{{SurveyQuestion.QuestionName}}}
{{{SurveyQuestion.QuestionHtmlContent}}}
9. Other Default Settings
The Survey Builder also allows us to customize the Language Settings. Even the entry level license allows multiple languages for survey usage. In addition to the Engagement Context Settings, we can also use the default settings to determine if the Survey Invitation belongs to the Survey Owner or the Owner of the records associated with the invitation.
10. Survey Invitations
Once you have the survey built, we need to establish who gets the invitation and when. We create a trigger, which is a Survey Invitation Rule. The set-up is similar to functionality as you may experience with building a Flow.
Action: Send invite when record is created, updated, or both
Object: Object that triggers the invitation
Record Type: Within the Object, which record type (or all) trigger the invitation
Field: Field on the object triggers the invite. It needs to be a picklist
Value: Value on the Picklist Field sends the invitation
Survey: Determine which Survey is send with this trigger
Recipient: This must be a contact – determine the contact that is related to the Object used to trigger the invitation.
11. Survey Data Model
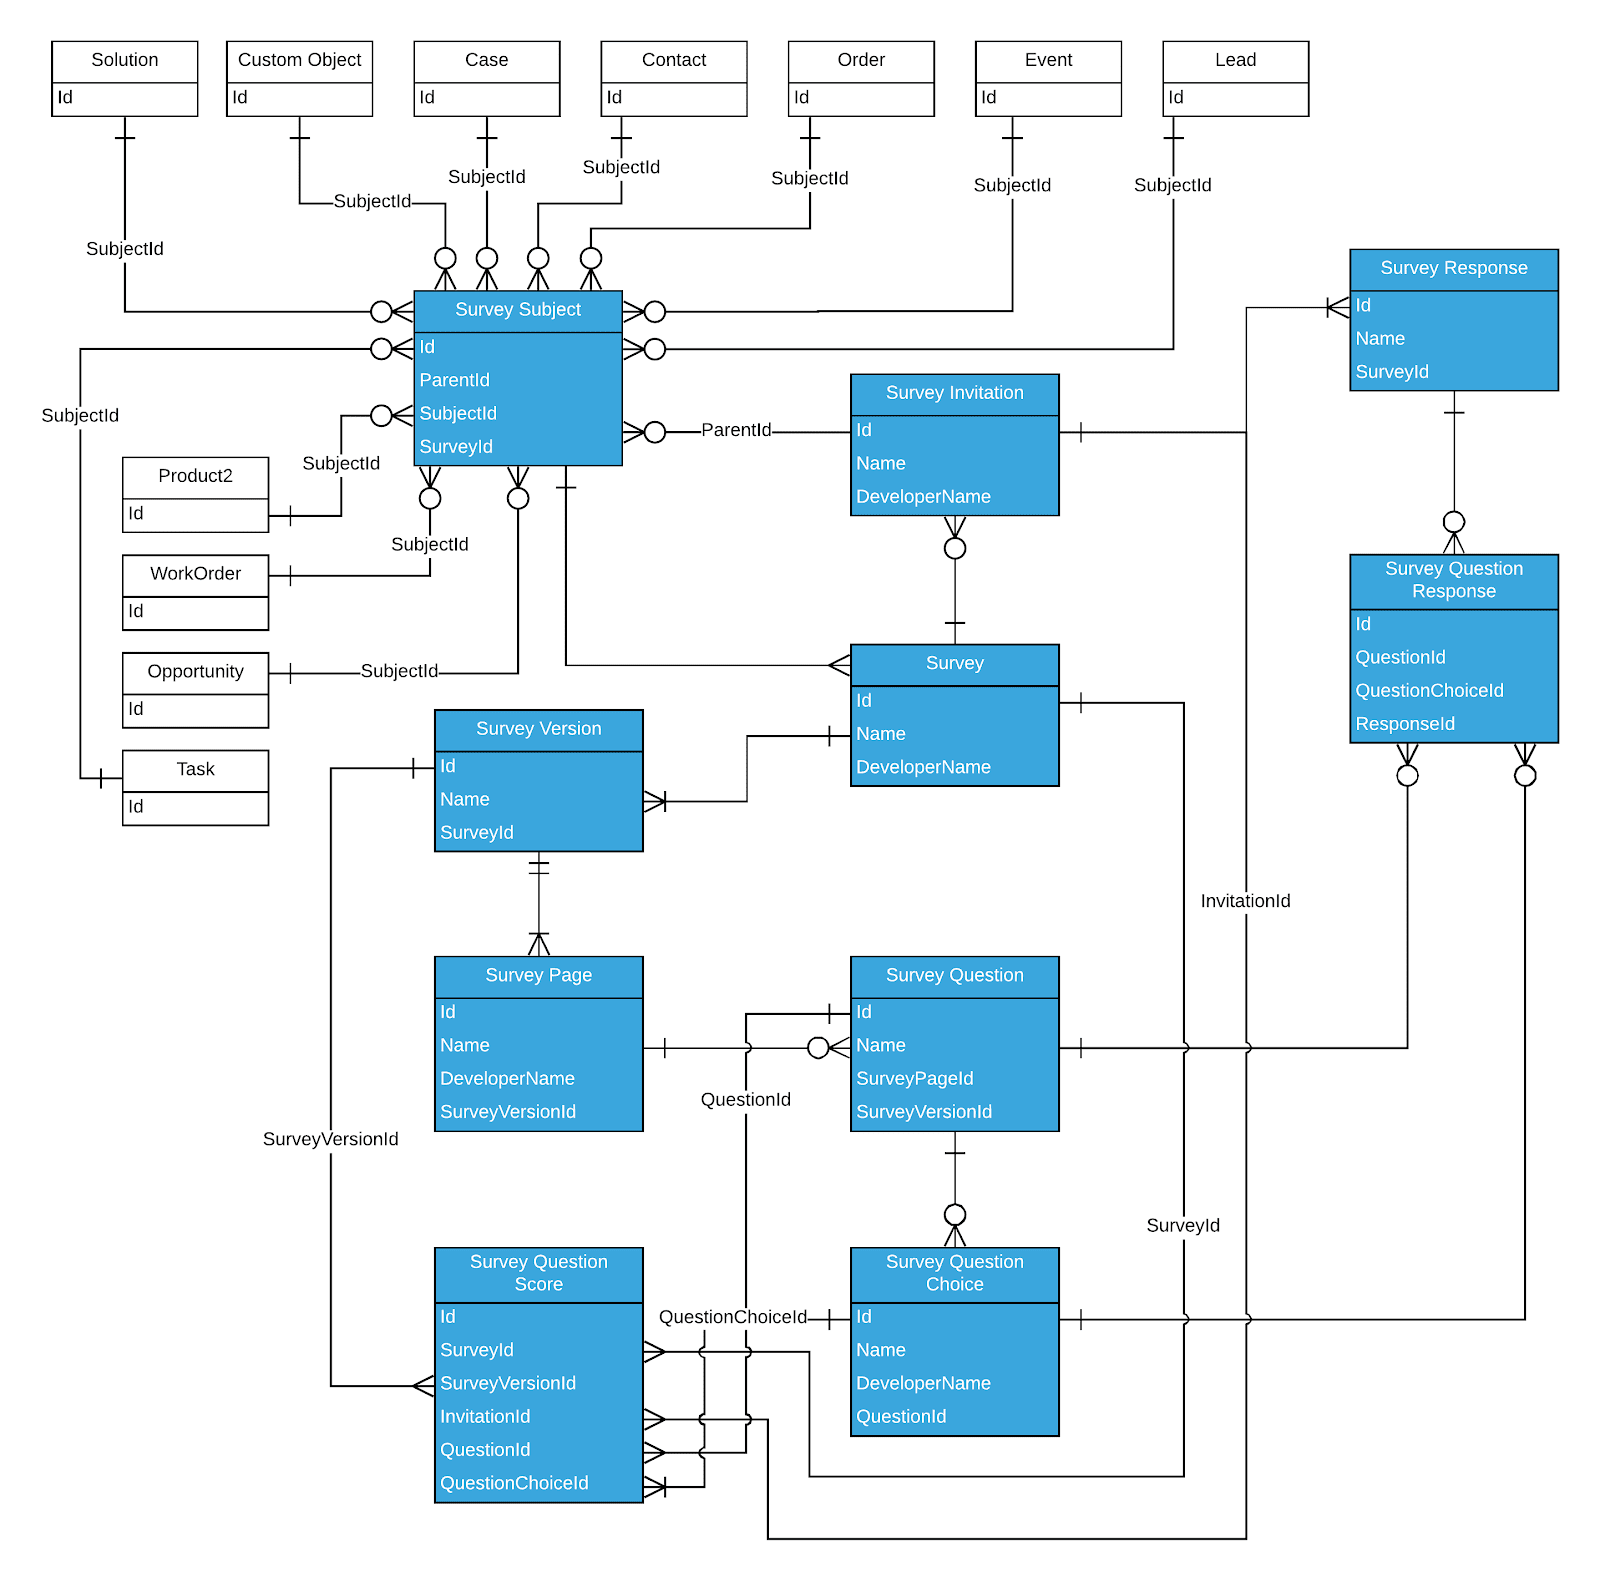
Surveys have an interesting data model. First of all, there is the Survey object itself. Related to the Survey record, there are Survey Versions. After creating the first version of the Survey, we can clone it to update or have different versions for different situations. Each of the versions will have a related record of Survey Questions that are children to the survey. The questions have attributes and fields established automatically as the Survey was designed in the Survey Builder. If the questions change from version to version, the different records will have different children objects (Survey Questions) underneath them.

In addition to the Survey Versions, the master Survey record will also have a related list of Survey Invitations. This is each instance of when the Survey was triggered to be sent out to a customer. When the customer replies back, this creates a Survey Response record that is related to the Invitation. Just like the Survey Version has children that are Survey Questions, the Survey Response has Survey Question Response as Children. This means that when a customer responds, it does not create a single record, but a “master” Survey Response record and multiple Survey Question Response child records.
12. Reports
The good news is that the reporting is relatively easy with Surveys. They come with out-of-the-box reporting and dashboards, as well as the option to utilize the Analytics app. If you are just getting started, or using the Survey Response Pack license, you may want to stick to simple reports and dashboards. However, if you are using customer insights and responses to drive your business, you should strongly consider using the Analytics App to gain the maximum amount of information from your customer responses.


