Salesforce Permissions in a Nutshell: Organization-Wide Defaults vs. Role Hierarchy

7 min
Salesforce’s Data Security Model is one of those things that people love about Salesforce - it is not that complex and provides ample flexibility for its users. In our last article from the “Salesforce Permissions in a Nutshell” series, we talked about Object and Field Level Security by comparing Profiles and Permission Sets. If you haven’t started on this series yet or want a refresher, please see Salesforce Permissions in a Nutshell: Profiles vs. Permission Sets.
Okay, now that we have set up Object and Field Level Security, what’s next? How do you ensure your users can see the records they are supposed to? That is where Record-Level Security comes into the picture. But how do you even set this up? Well, you are in the right place, as we will discuss this in today’s article. So hang tight as we learn how to share records with your users across the organization.
There are several ways to control your users’ access to records.
- These are:
- Organization-Wide Sharing Defaults or OWD
- Role Hierarchy
- Manager Groups
- Sharing Rules
- Manual Sharing
- User Sharing
- Apex-managed Sharing
- Restriction Rules
- Scoping Rules
- Team Access
Today, we will be focusing on Organization-Wide Defaults (OWD) and Role Hierarchy. However, before we delve any further, let us know what Record Sharing is.
What do you mean by “Record Sharing” in Salesforce?
Record Sharing is the act of granting access to an individual user or a group of users and what actions they can perform on those records or data sets. Sharing record access can be done through the User Interface (yes, declaratively!) and programmatically via Apex.
Organization-Wide Sharing Defaults
The base record-level security feature you need to set up is “Organization-Wide Sharing Defaults,” or, as we call it, OWD. Think of it as the foundation of a building or a house.
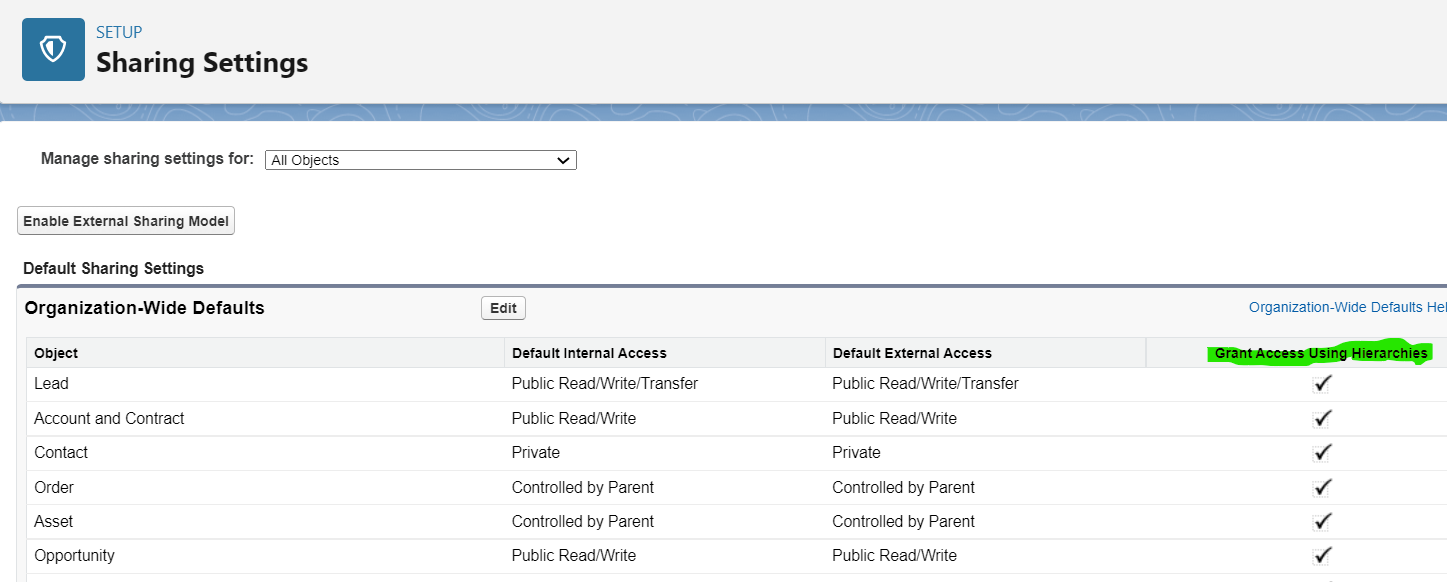
You can access this by going to Setup, then on Quick Find, search for “Sharing Settings.”
%2012.56.27.gif)
How does OWD work? It defines access all users have for records of an object. Most objects have Private, Public Read Only, and Public Read/Write options. If an object has Public Read or Private, an admin can grant access to users by setting up a hierarchy or sharing rule. If an object has a master-detail relationship with another object, you can also see “Controlled By Parent” as an option.
Please see the table below for more details on the different OWD access options combined with the object level accesses:
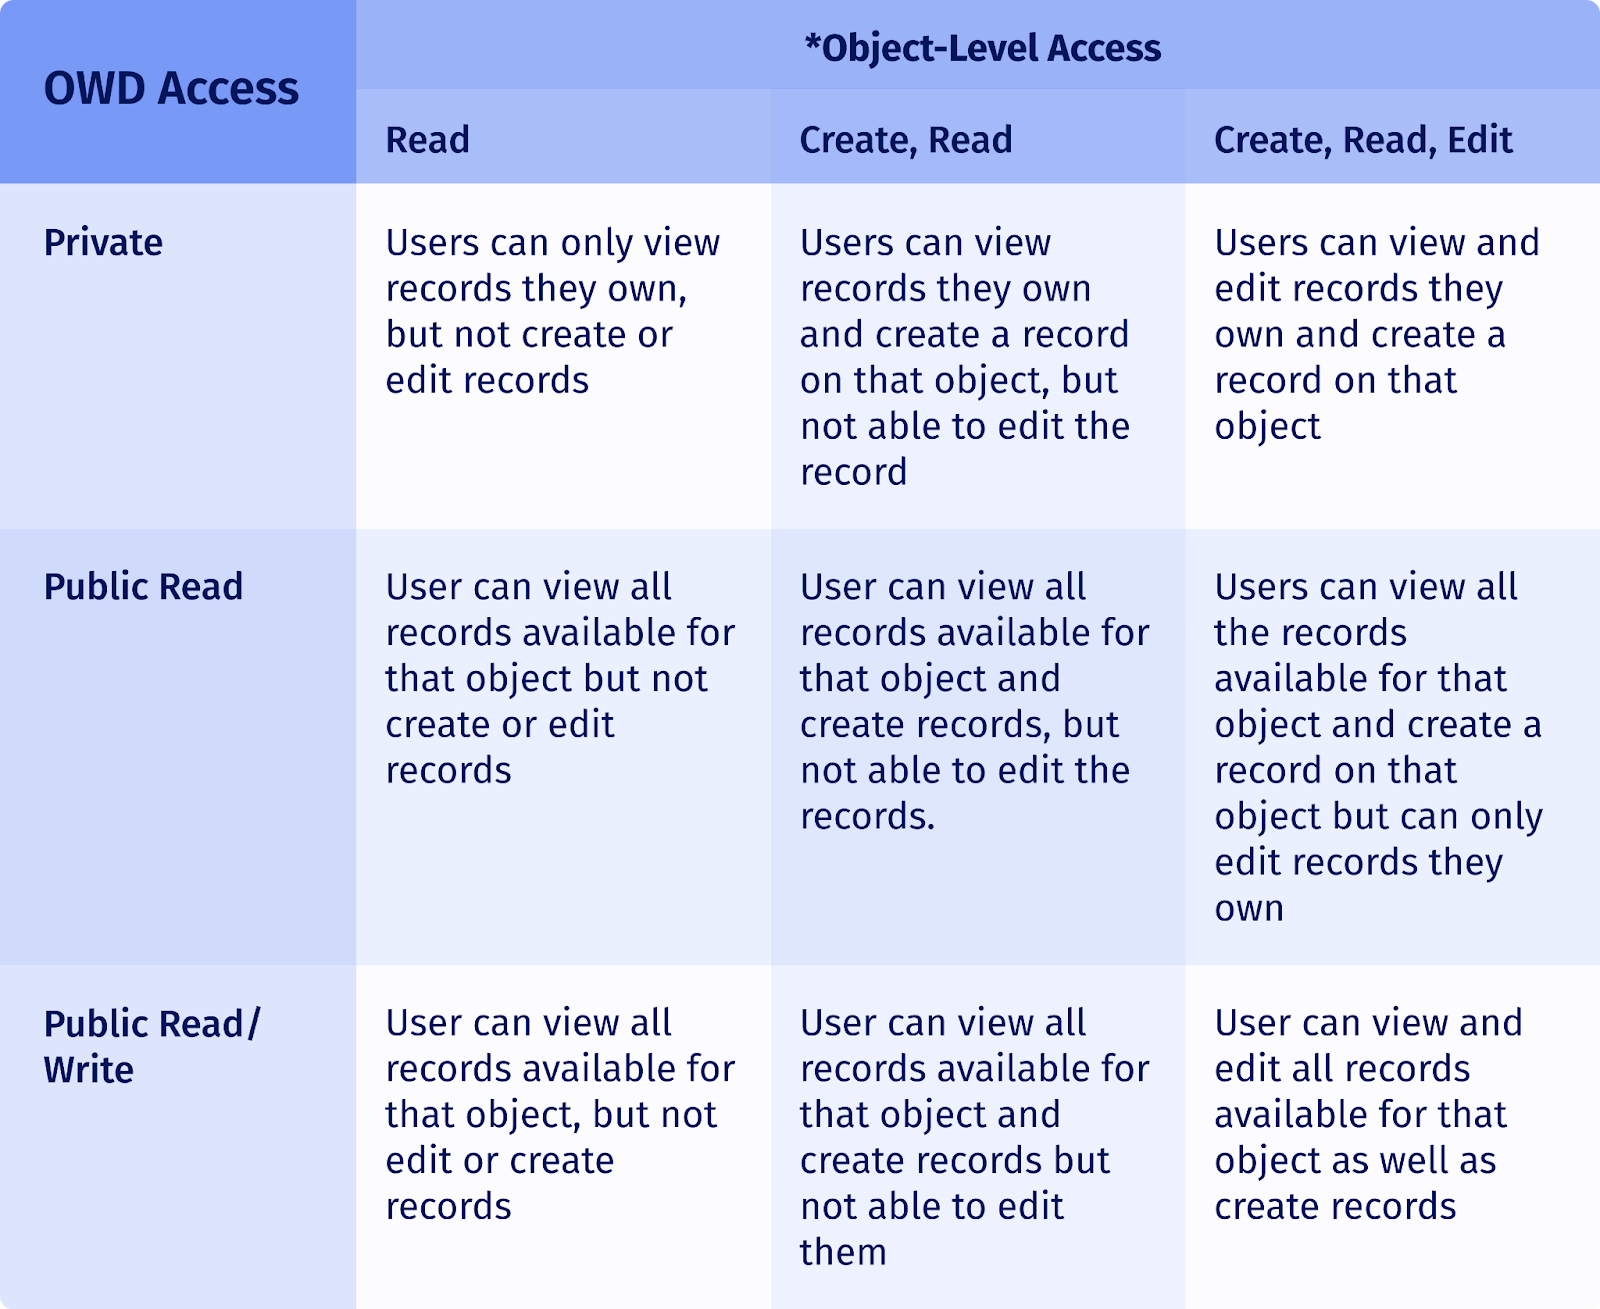
As you can see, you need the correct combination of accesses set in the OWD and object level to achieve the desired results. So the next time you come across an issue where your users cannot see a record or can see a record they are not supposed to, consider checking the object’s OWD or object-level access set in the profile or permission set.
- You can set OWD for three types of users:
- Internal - They are usually employees working within your company or consultants who may need broader access to your organization. They log in using login.salesforce.com or your company-specific domain, such as loremipsum.my.salesforce.com.
- External - They are users who interact with your company as part of your business process but are not internal employees. The usual use cases of this are Self-Service, Help Centers, Customer Portals, broker and Dealer Portals, etc. For example, you have created a Support Portal for your end-users with the URL support.loremipsum.com. Users will be identified as external once they log in to your Experience Cloud Site.
- Guest - They are users who access your Experience Cloud site as a public user or someone who has not logged in or has not been authenticated. If your Experience Cloud site has been made public by default or has pages set to Public, all users will be identified as Guest users until they log in.
Role Hierarchy
Role Hierarchy works with Sharing Settings to define users' access levels. Users can access records that users directly below them in the hierarchy have access to. Even though a Role Hierarchy resembles an organization chart, it does not have to match. A good role hierarchy should represent the level of record access that a user or group of users needs. It is also sometimes referred to as “parallel record sharing.”
How does Role Hierarchy work?

Consider the role hierarchy illustrated above using the table of outcomes below.
.png)
As shown in the examples above, only users directly above the hierarchy can access a user's data even though two users of different roles are in the same data access level, such as EMEA Regional Vice President and AMER Regional Vice President.
- Common use cases
- A group of users who needs access to the same type of records can be assigned to one role
- A manager should always have access to his subordinates’ records regardless of what is set in OWD
How to view and create a Role
To view existing roles and to create one:
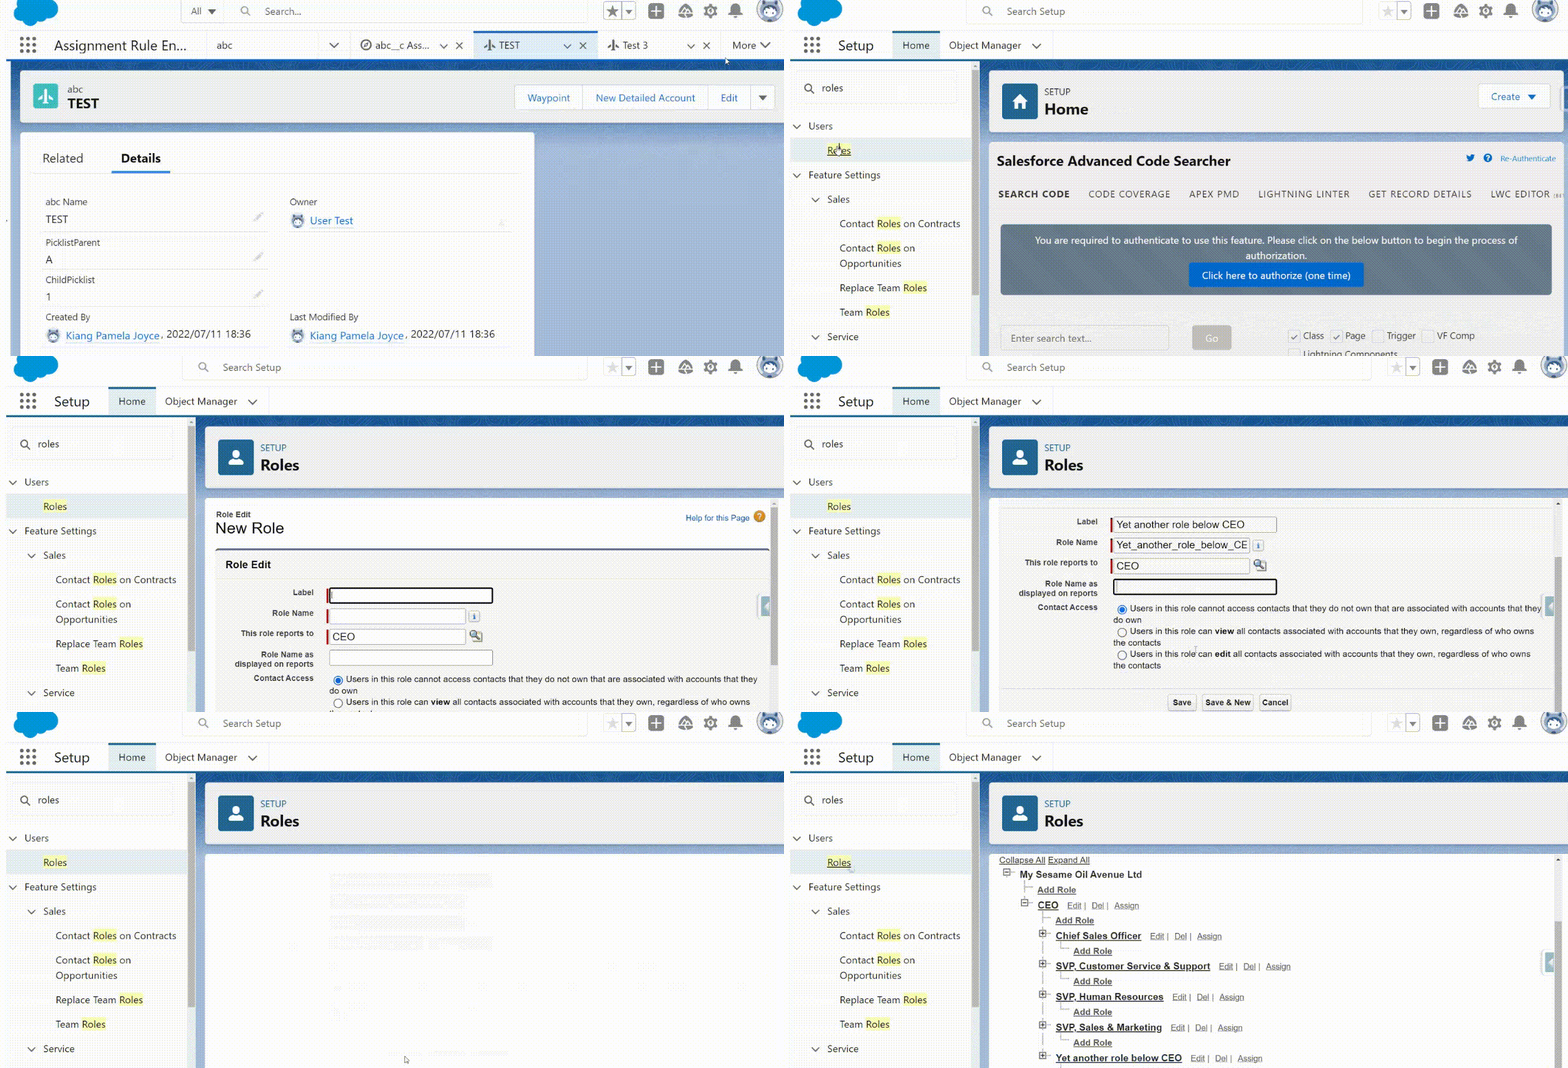
- Go to Setup -> Search “Roles” in Quick Find
- Click on the + (Expand) button to see the other roles below a role
- Click the “Add Role” link below the role you wish to add a role under
- Provide the Label, Role Name, and Role Name to display on Reports and hit the “Save” button
You can also add a Role programmatically via Apex. (We will discuss this in a future article, so hang tight!)
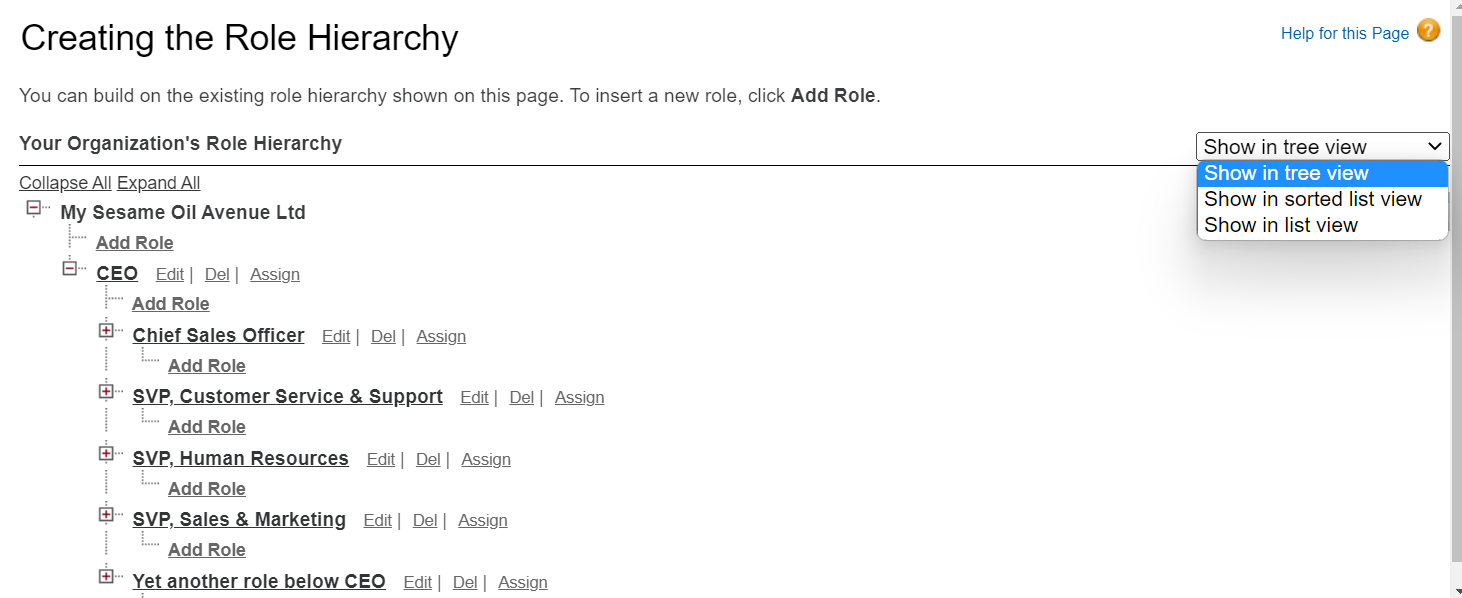
You can also change the view of the Role Hierarchy by selecting any of the available options found at the top-right of the “Creating the Role Hierarchy” Page.
How to assign a user to a role
There are two ways to assign a user a role via the UI. The third one is via Apex.
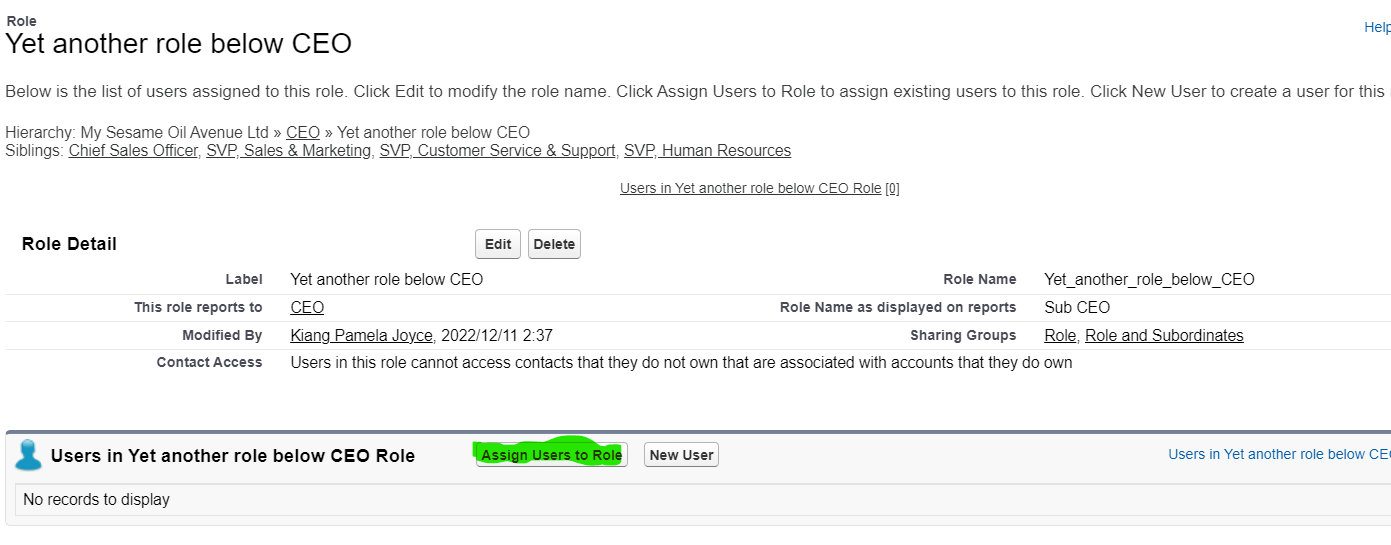
Adding a user via Role Detail Page
- Go to the Role to which you want to add a user
- Find the section “Users in <Role Name>”
- Click the “Assign Users to Role” button.
Adding a role via User Detail Page
- Go to the User you want to add a role
- Click on the “Edit” button
- Click on the “Role” picklist and select a Role
- Click “Save”

Do bear in mind that you can have multiple users assigned with the same role, but a user cannot have more than one role.
How can you share/view records using role?
- Organization-Wide Defaults
“Parallel Record Sharing” happens when “Grant Access Using Hierarchies” is enabled for the object
- Sharing Rules
You can use Roles to share records via Sharing Rules as well as shown below. We will go into Sharing Rules in more detail in the following article of the “Salesforce Permissions in a Nutshell” series.
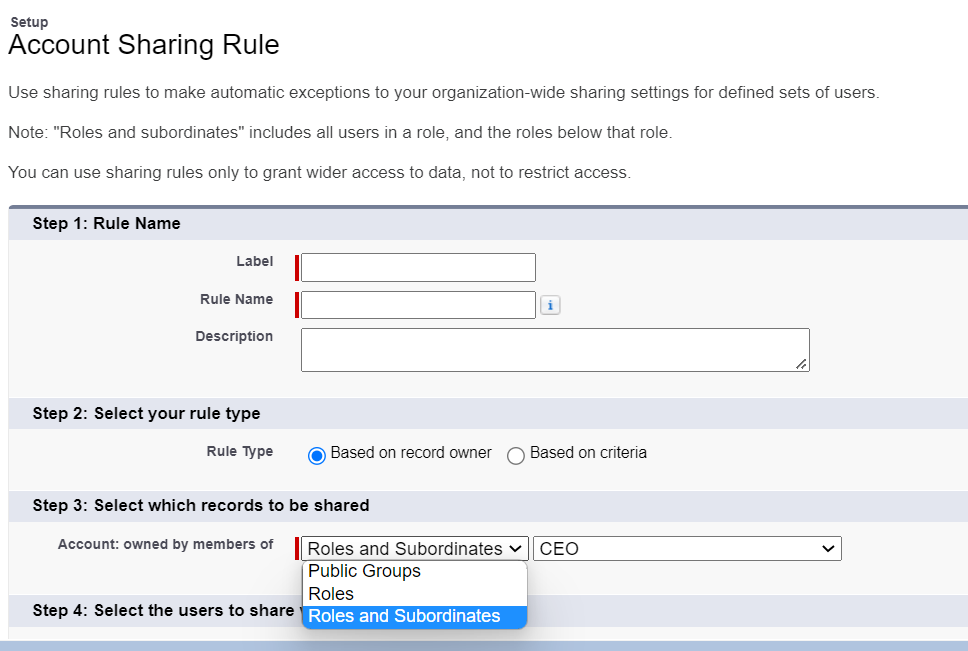
In the following references of roles, you will also see “Roles and Subordinates.” What is the difference? If you only selected “Role,” then only users in that role will have access to the records you shared. If you selected “Role and Subordinates,” all users in the role you selected and users in the roles below it will have access to the records.
- Manual Sharing / Apex managed Sharing
We will also discuss these two in detail in the following articles but as long as sharing is concerned, you can use Roles to share records.
Other usages of Roles
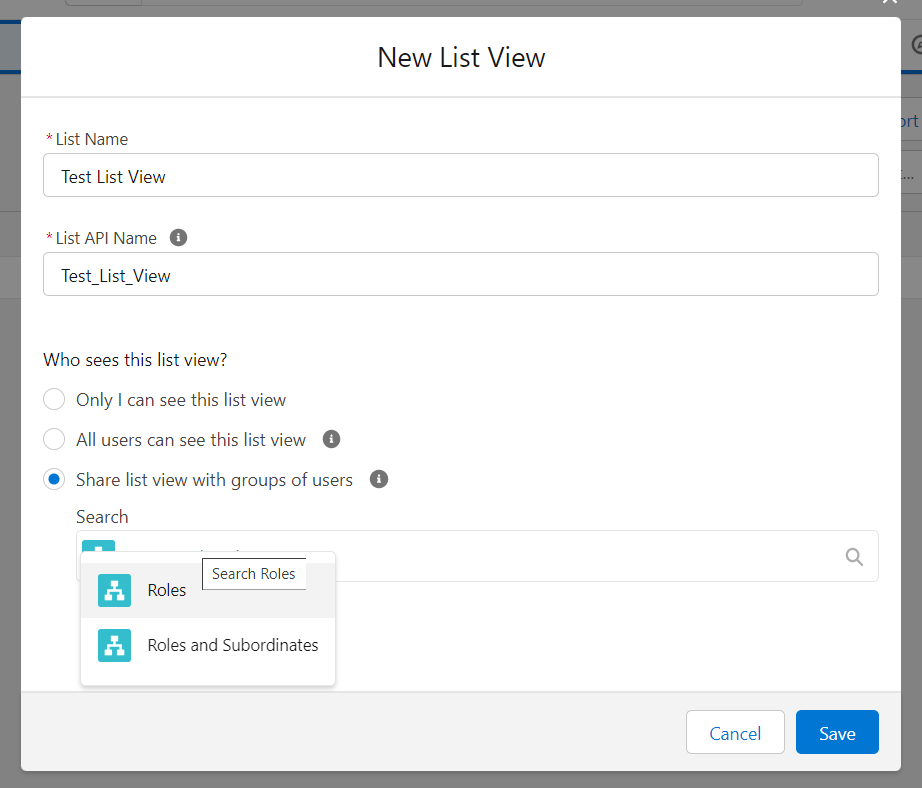
- List Views
When creating list views, you can specify which role can only see the list view.
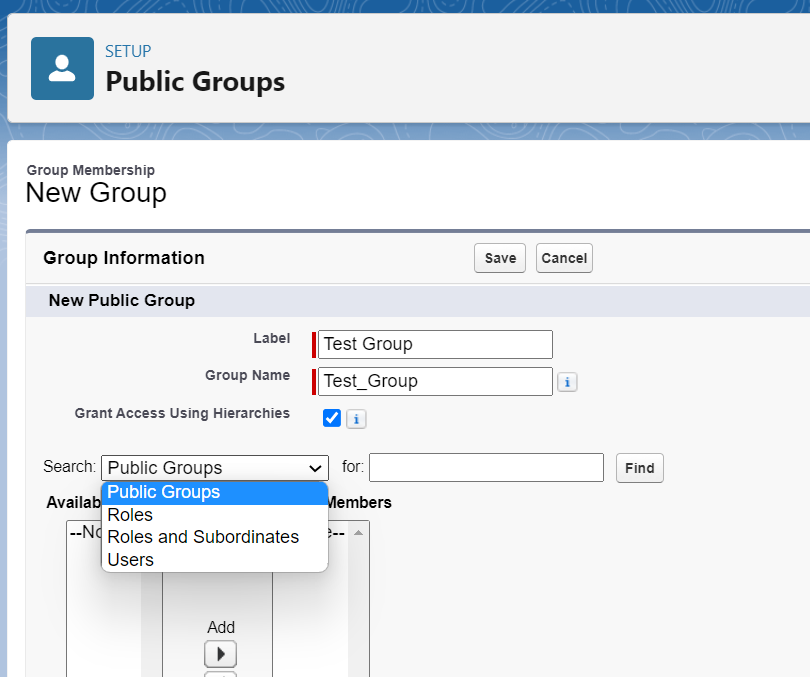
- Public Groups
A public group is used to assign things or resources which are meant to be seen or used by everyone in the organization in just one click. It may contain individual users, roles, or roles and subordinates.
- Reports and Dashboards
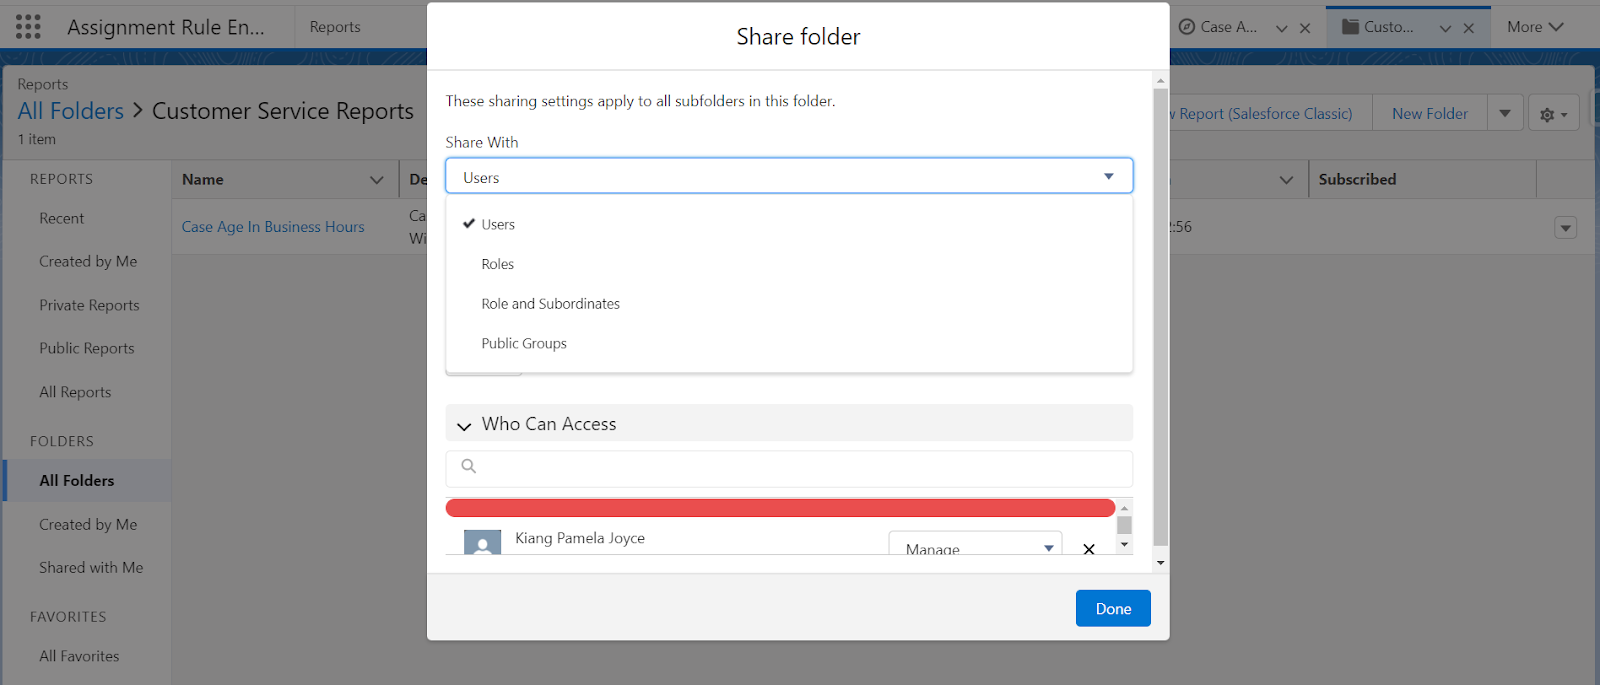
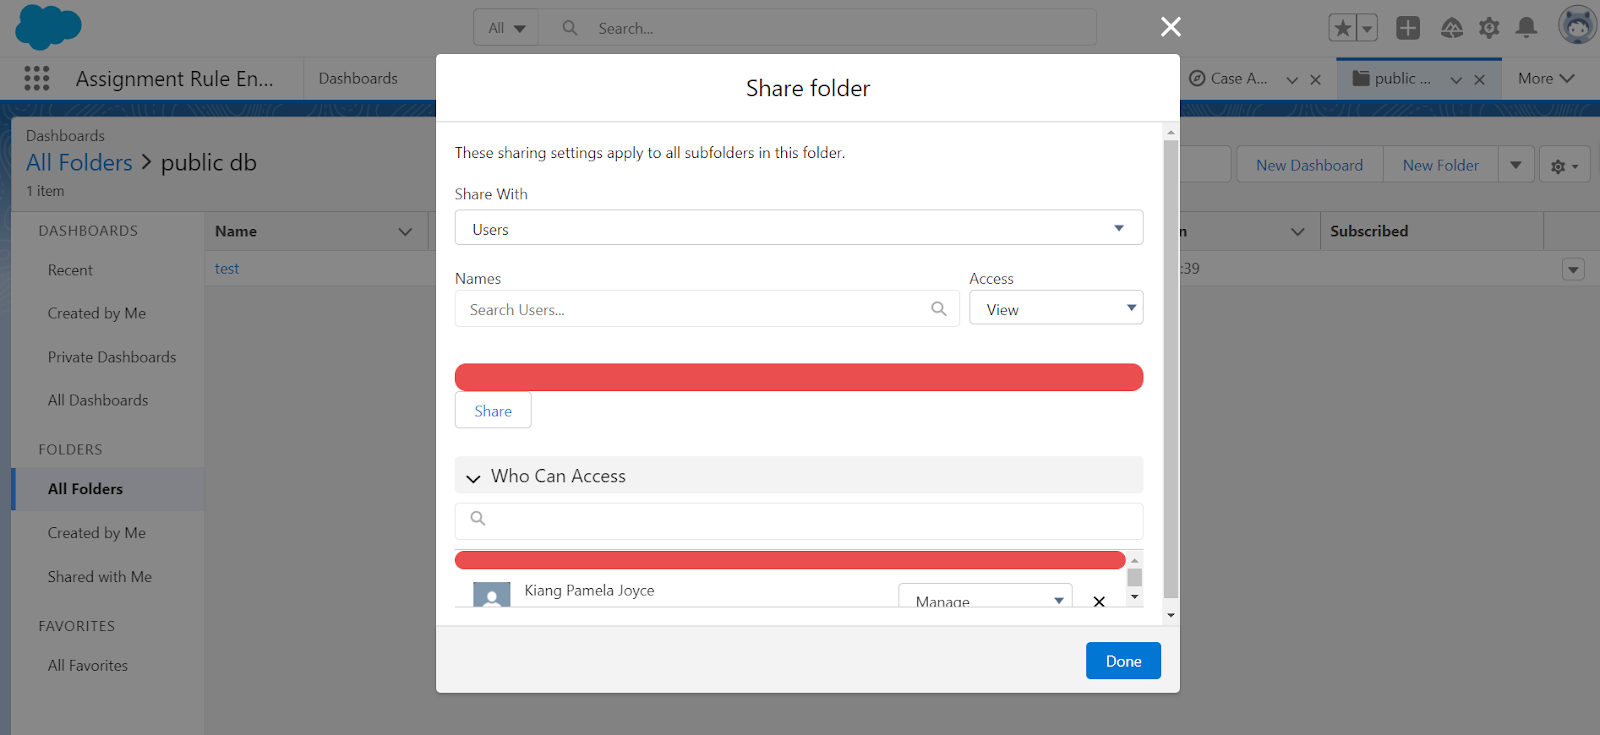
You can share report folders and dashboard folders using Roles and Roles and Subordinates
Easy as 1-2-3, isn’t it?
Record-Level sharing is a bit daunting, but with this article, we hope to explain the trickiest bits in a more straightforward, concise manner. Stay tuned to the following articles, where we delve into other record-level sharing and Salesforce permissions!


