Salesforce Queues explained

7 min
What Are Salesforce Queues?
Given a list of records with no user or owner, a Queue is a location where records await processing by a group member. Salesforce queues are therefore used to share the workload between different members working under a single team. There is no limit to how many queues can be created in Salesforce, and they support Cases, Leads, Service contracts, and all Custom Objects in Salesforce.
- Multiple lumps make Salesforce Queues:
- Queue members
- Queue email (optional)
- Assignment rules
- Quick actions
Types of Salesforce Queues
.png)
Who Can Collaborate in a Queue?
Users who have access to queues are called Queue Members. Those with a higher role hierarchy can also access and take ownership of the records.
- Queue Members can be added in the following ways:
- Single users (one user at a time)
- Roles, Roles and Subordinates (multiple users at once)
- Public groups

How to add Records to a Queue?
There are two ways in which records can be assigned to any owner or user: manually by changing the owner field of the record or using assignment rules.
1. Assignment Rules:
Records can be assigned to the queue by creating certain specific criteria when the record is created. For example, Leads from India add to the “India Lead Queue.”
2. Manually:
We can assign records by going to the Record’s page and changing the “Owner” field. For example, change the lead owner to “India Lead Queue.”
How to create Salesforce Queues?
Part 1: Create a Queue
Steps to create Queue in Salesforce:
- Login to your Salesforce Account
- Go to Setup
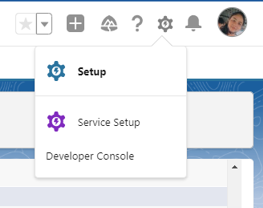
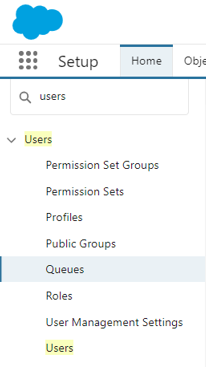
- In the Quick Find box, search for Queues. You’ll find them under Users.
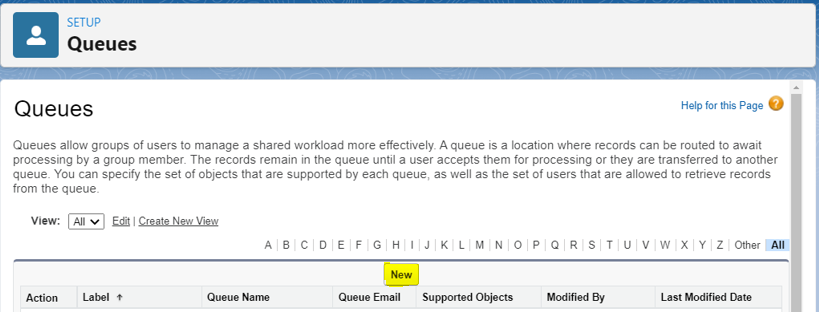
- Click the new button that is in the center of the page.
- Add the Label Name, Queue Name, and Queue Email to get notifications.

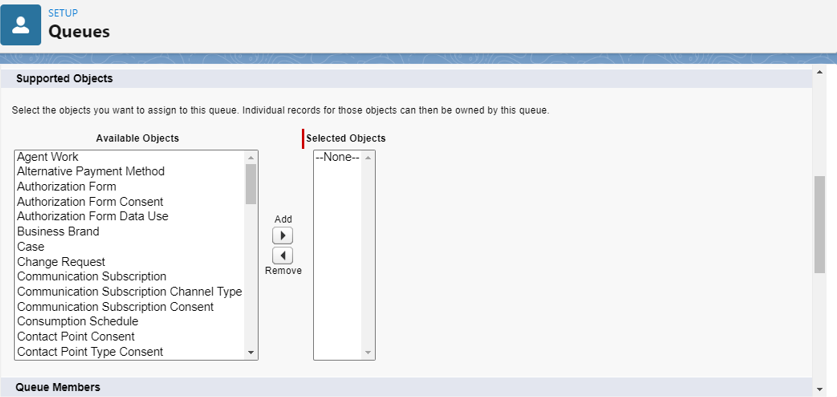
- In the Supported Object section, add the object you want to create the queue for.
- In the Queue Members section, you can add either individual users, from public groups, or from Roles and Subordinates.

- Save the Queue.
Part 2: Assignment rules
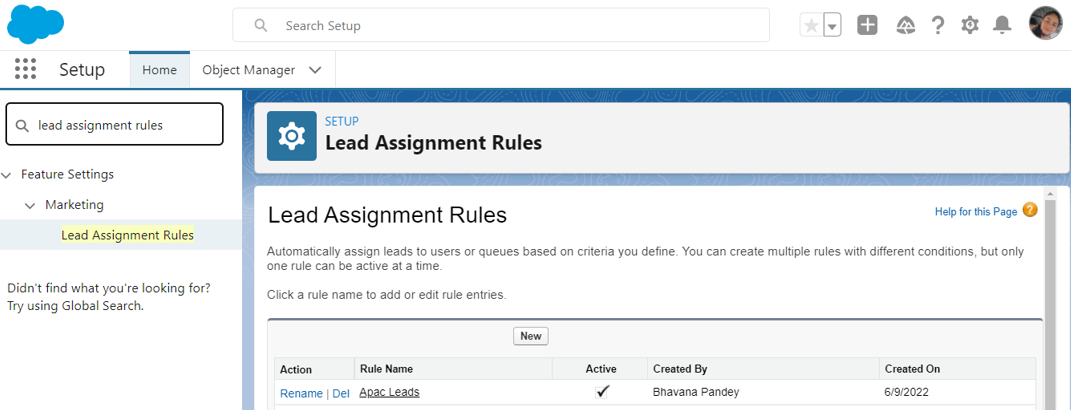
- In the Quick find box search for “Lead Assignment rules.”
- Click the new button that is in the center of the page.
- Add the Rule Name, check the active checkbox, and save it.
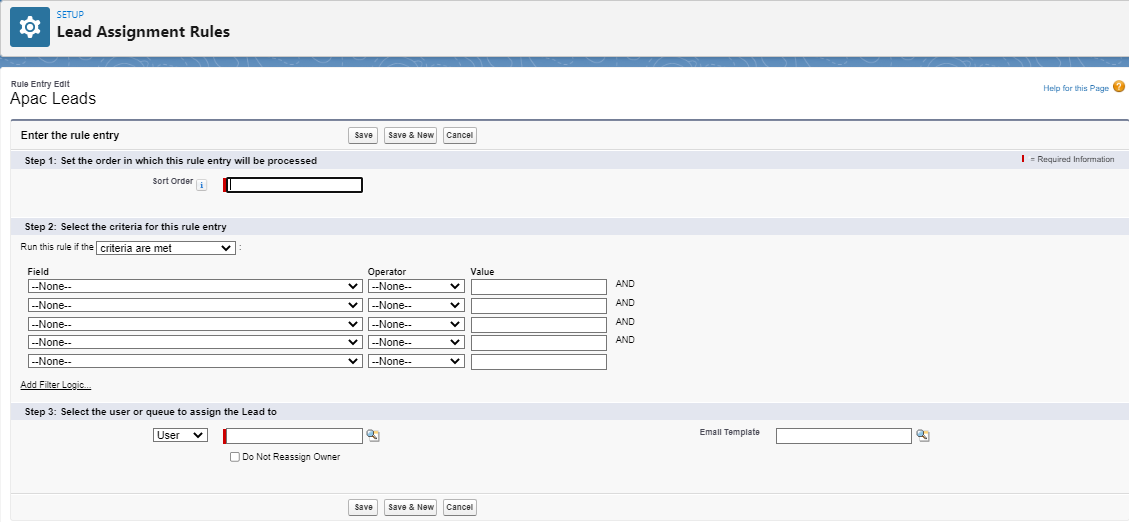
- In the Rule entries, click “New.”
- Add the sort order.
- Define your criteria.
- In the assignee part, select queue from the picklist and assign it to the queue you have created. Save the rule.
Part 3: Test it out
- Go to the Leads tab.
- Select the Apac Leads(all queues automatically create a list view)
- Create Lead with the defined criteria.

Advantages of Salesforce Queues
- Helps teams manage Leads, Cases, Service Contracts, and Custom Objects.
- Reduces the workload for users and employees.
- Keeps the track that no lead or cases are left unattended.
- Helps to prioritize tasks.
- Helps manage work if still there are few members in a team.
Queue essentials to bear in mind
- We can create a single queue for multiple objects because queues are not bound to a particular object.
- Regardless of the sharing model, users should always have edit permission or access to the object in order to take ownership of the queue in which they are already a member.
- Admin, Users with “Modify All” permission for an object, and Users with “ Modify All data '' permission on their profile can view and take ownership of the records regardless of sharing model or membership in the queue.
- Queue members can be changed by Admins and Mange [object name] privileges.
- Before deleting any queue, reassign its records to another queue or users and remove it from assignment rules.
Though Queues might be a minor feature provided by Salesforce, it greatly impacts business activity. Using queue is an intelligent way to work, so start learning and extending queues in your organization today and reduce your team's workload.
If you’d like to know more, catch up on the 5 things you should know about Salesforce Queues.


.jpg)
.jpg)


