Ultimate guide to create call lists in Salesforce using List Views

7 min
It’s widely understood that Salesforce is the industry frontrunner and market-share leader in the Customer Relationship Management (CRM) universe. The greater the volume of a business’ customers, the more important it is to have a system that manages client information, process automation, reporting, task documentation, scheduling, and more. Of the many types of businesses, Contact Centers regularly work with massive client bases, making them an ideal candidate for a robust CRM platform.
Within Salesforce, organizations can quickly and easily create contact lists for their teams – business development, sales, customer service, etc. There are different ways to create a list with List Views, Reports, and Campaigns being the most prominent. There are pros and cons to each one, but this article will focus on making calling/contact lists utilizing List Views, which is arguably the most complete option.

Before diving into this ultimate guide for creating call lists with list views, it is worth looking at the types of records that could be used for a calling list.
Calling List Objects
While a list can be created based on any object, there are four primary options. Or maybe four and a half depending on how you look at (see Person Accounts below). Organizations may vary in how they utilize and define objects like Leads and Accounts. For the purpose of this article, we’ll use the best-practice and industry standard definitions. Of course, calling lists are not always used to sell something. This could be a group of patients, students, volunteers, or many other areas.
Leads – these are customers – individuals or businesses – that we are potential customers. Typically they have not yet expressed interest in working with us as clients. Leads can progress through different stages from initial contact attempt up to the point where they are ready to be converted to an Account, Contact, and potentially Opportunity.
Contacts – individual people. These could be Contacts associated with an Account or business, or they could be individual Consumers, as is frequently the case with B2C businesses.
Accounts – organizations or businesses. It is possible that one Account may have several Contacts associated with it. Also, some orgs utilize the Account object for individual customers, in addition to the Contact record. For example, Bob Smith may be listed as both an Account and a Contact. This is useful for leveraging Salesforce standard functionality.

Person Accounts – a special version of Accounts that combines the Contact and Account into a single record. It contains the fields and information of both an Account record and a Contact record, which has the added benefit of standard Salesforce functionality for both (in most cases). This is a nice option for organizations that work heavily with individual consumers, as it saves the need to enter an Account and Contact separately. A single entry will work for both.
Custom Objects – there are times when an organization may create a custom object to manage their clients or a sub-section of them. Custom objects can be useful especially if Contacts and/or Accounts are already being used for a different aspect of the business. While Record Types give a company the ability to segregate the business while still using standard objects, sometimes businesses see value in keeping a group of clients completely separate through the use of a custom object that can be managed separately.
List View Features Overview
Every standard and custom object can use List Views. This powerful tool enables the Salesforce Admin and even the user (with proper permissions) to create a list of people. By clicking on the object tab, Salesforce will display the default list view for the object. The “Recently Viewed” and “All” list views are available by default. New list views can be created by selecting “New” or “Clone” from the gearbox icon on the right side. Select “New” to start from scratch or “Clone” carry over the fields and filters from another list view. The List View features below help to make dynamic and personalized calling lists.
Filters
Without any filters, the list view would just contain all of the Leads/Accounts/Contacts for the entire organization (that the user has permission to see). Filters are used to customize the list down. Some filters are ideal for creating calling lists:
Owner – select “All” or “My” Accounts/Leads, etc. Using the “My” filter will populate the list only with records where the user is the owner. This tool allows the same list view to show different clients for each member of the team.
Lead Source/Type – team members may be working different lists of clients. Use a lead source or type picklist to include or exclude different clients. If you’d like to have separate calling lists for each lead source, create the first one using Lead Source as a filter (i.e. “Lead Source equals Web Form”). Then clone the List View and change the filter on the new list (i.e. “Lead Source equals Referral”).

Stage or Status – depending on the complexity of the sales process, clients may require different calls/emails at different stages. Use a stage/status field as a filter to build a list based on criteria like “negotiating”, “proposal”, or “nurturing”.
Checkboxes – a simple checkbox can be very powerful. With just two outcomes – Checked/Unchecked – this field type can be used to quickly exclude or include records from the list. Checkboxes can be manually filled out, completed via a flow/process builder, or populated based on a formula.
Date References – using dates helps narrow down leads into useful buckets. For example, a call center could reach out to clients due for a renewal in the next 60 days. A collections team could call a list of customers with a Past Due Date between July 1st and September 30th. A customer service team may do a follow up call 3 days after an inbound call to conduct a survey about their experience.
Relative Values – we can utilize the less than and greater than build specific lists, too. Accounts may have a roll-up of their opportunities’ amount fields. Build lists of high value clients with filters such as “Amount >= $1,000,000”. Break down Leads by lead score by bucketing lists (i.e. List #1 = Lead Score < 4, List #2 = Lead Score >= 4 + Lead Score < 7, List #3 = Lead Score >= 7).
List Views – Display As
Even within List Views, we can set up the lists to display multiple ways. Each of these views has pros and cons, but as you’ll see below one option is superior for Calling Lists.
Kanban – let’s start with the one that isn’t the best fit for most contact centers and calling lists. The Kanban display certainly has its advocates. The display is a nice graphic depiction of Account, Leads, or Opportunities (or other objects) moving along a path from one stage to another. Each record appears as a “card” on the Kanban board under the column that corresponds with its current stage. The card provides a quick overview of key fields to give the user a snapshot of the record. The record can be moved from one stage to the next just by dragging them out of one column into the next. Kanban is not a bad option when there are not too many records on one list. It’s also useful when the calling list is going to be worked in a non-linear fashion, and the user can quickly find the card. For bigger calling lists (i.e. 100+ leads for example), the Kanban display gets very busy and difficult to work.
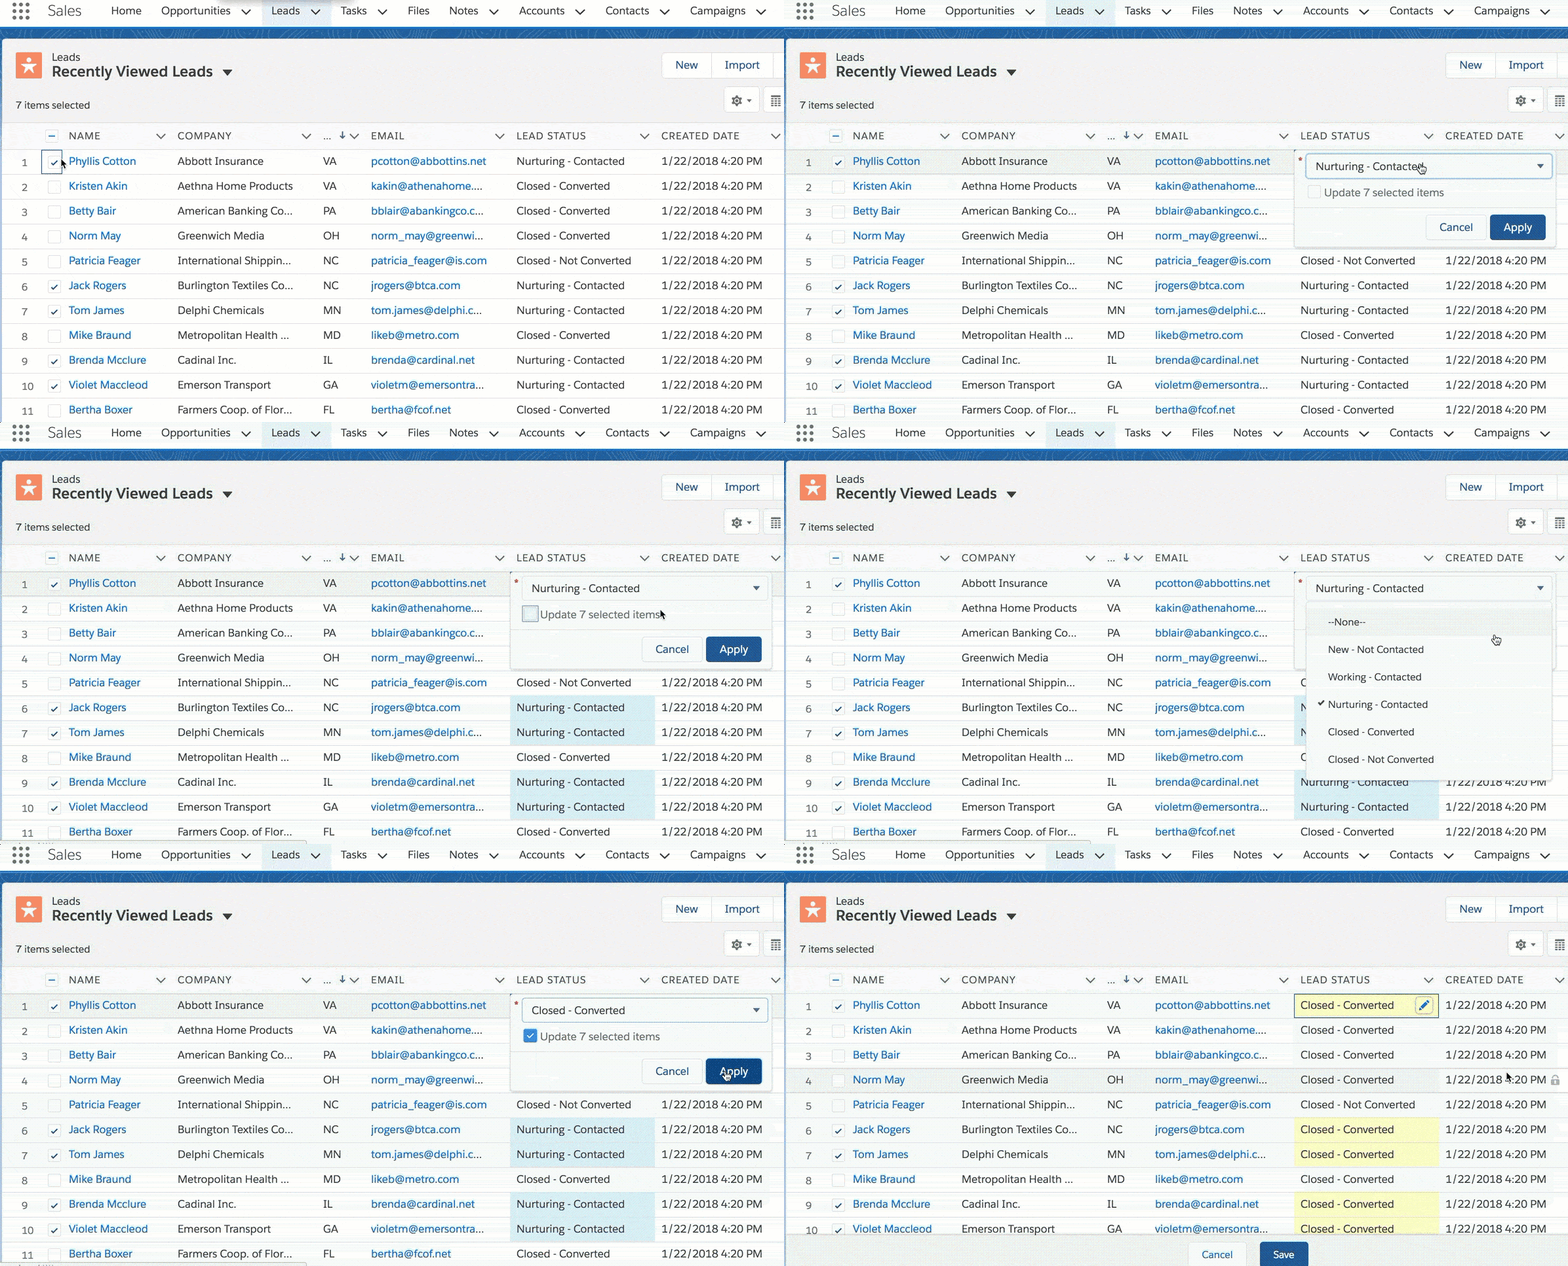
Table – this is the default view and simply displays each record in line. The records can be sorted on the fly just by clicking the headers at the top of each column. This display is also ideal to make use of in-line editing. Within an Object, we can break down records into different record types. For example, we may have two types of Contacts as customers for an internet provider company – B2C customers and B2B business contacts. We can create a separate record type for each one, while they are all contact records. As long as the Table List View is filtered back on record type (meaning all of the records on the list are the same Record Type), then users can make edits to the records right on the list. This is an incredibly convenient feature that allows us to keep working the list without navigating off the page. Even better, by selecting several records with the checkboxes on the side, we can update several records at one time.

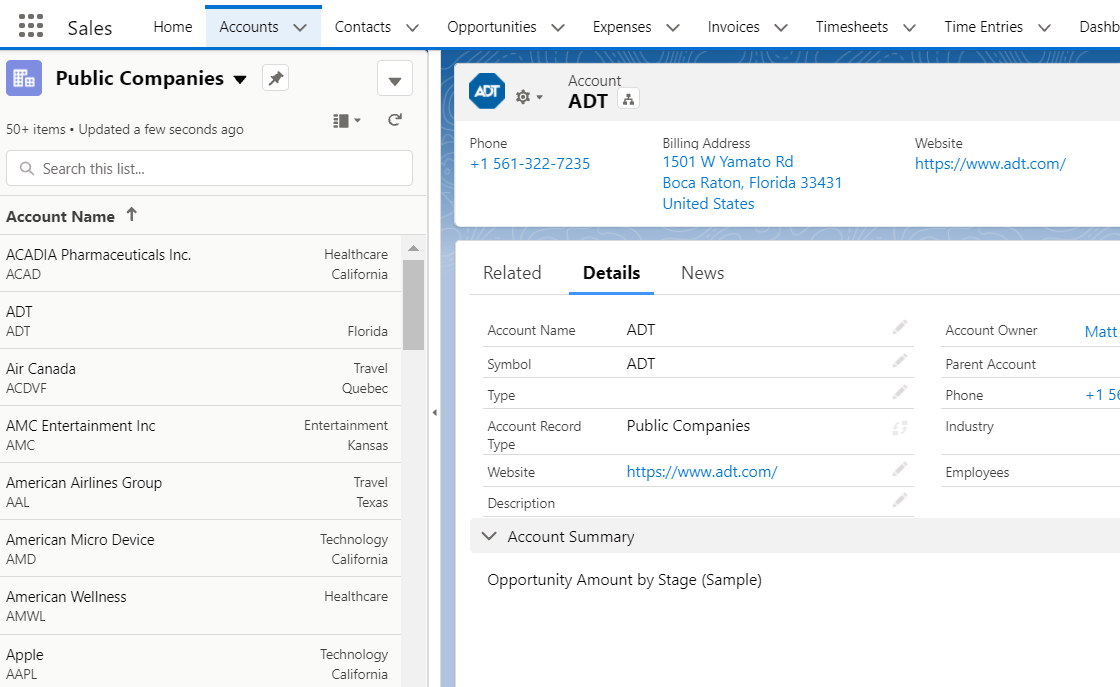
Split View – the best of all worlds. The split view option is ideal for calling lists. In this display, the list of records is visible in a sidebar on the left side, with a handful of view fields visible. By clicking on a record, the wider right-side pane displays the record's detail or lightning record page. Users can access a massive amount of record data, make updates to the record and even see details of related records. Meanwhile, the list stays anchored to the left side. After the call is complete and the record has been updated or dispositioned, just click on the next record – again without ever navigating away from the page.
Other List View Benefits
Another benefit of List Views is the real-time dynamic updating of the list. A refresh button on the List View will quickly update the records displayed without having to do a full refresh of the browser webpage. As users work down the calling list, dispositioning and record updates may cause the record to be complete – and no longer belong on the list. After making the update, hit the refresh and the record will disappear from the list if it no longer meets the criteria.
Likewise, new records can be added as they come in. A contact center manager may be assigning new leads throughout the day or re-assigning contacts due to an absent employee or unbalanced workload. Assignment queues can automatically divide up records as they become available, adding records to calling lists throughout the day.
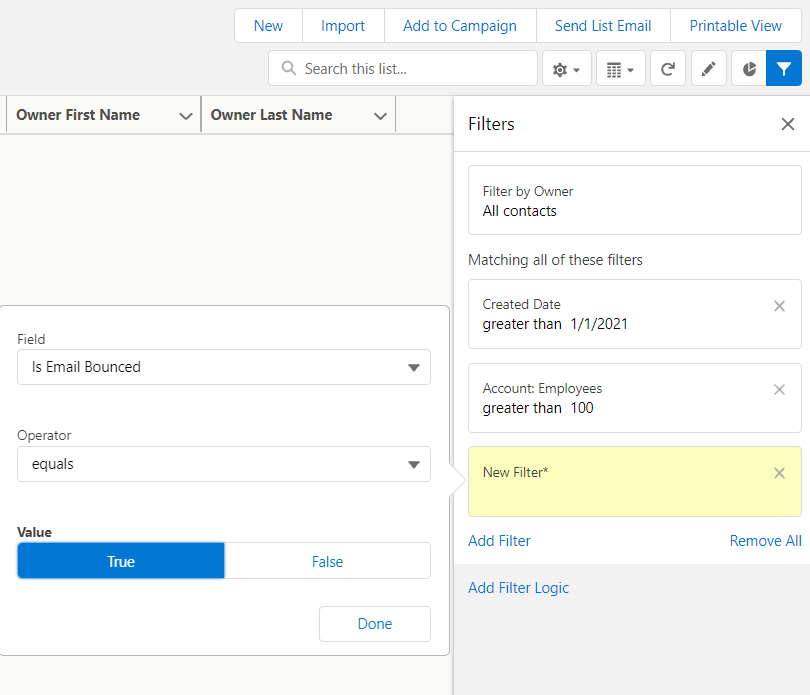
We can also quickly modify list views by tweaking the filters. Since the filters are quickly and easily edited using the funnel icon on the right side, a manager can make changes to the filters to expand or contract the list. For example, perhaps the team comes in short-handed on a Monday with a huge workload. A manager can adjust a filter from Lead Score >=5 to Lead Score >=8 in three quick clicks to build a smaller, higher quality list.
As you can see List Views provide enormous flexibility for contact center teams. Simple to build, easy to modify, and convenient for updating records, this tool will make any calling list more effective.


